Learn How to Use Deferred Components in Flutter for Improved Performance

Full-stack developer specializing in Flutter mobile applications and Spring Boot backends. I architect scalable cross-platform solutions with expertise in API integration, data management, and end-to-end application development
A Deferred Component in Flutter is a way to "defer" the creation of a component until it is needed in the app. This can be useful for several reasons, such as:
Improving the startup time of your app by not creating unnecessary components upfront
Reducing the memory footprint of your app by only creating components when they are needed
Allowing you to create complex components that might take a while to build, without causing any delays or hiccups in the app's performance.
Think of it like a hibernating bear in the wintertime. The bear stays in its cozy den, conserving energy and resources until it's time to wake up and go hunt for food. In the same way, a Deferred Component in Flutter stays "asleep" until it's time to be "woken up" and used in the app.
To create a Deferred Component in Flutter, you will need to follow these steps:
Add the Play Core library to your Flutter app by adding the following line to the dependencies section of the build.gradle file located in the
android/appdirectory:dependencies { implementation "com.google.android.play:core:1.8.0" }Enable SplitCompat in your Flutter app by adding the following line to the application element in AndroidManifest.xml, located in
android/app/src/main:android:name="io.flutter.embedding.android.FlutterPlayStoreSplitApplication"Enable deferred components in your Flutter app by adding the following to the
pubspec.yamlfile located at the root of your project:flutter: deferred-components:Creating a deferred component: Example
 import 'package:flutter/material.dart';

 class SamplePage extends StatelessWidget {
   const SamplePage({super.key});

   @override
   Widget build(BuildContext context) {
     return Scaffold(
       appBar: AppBar(),
       body: GridView.builder(
         gridDelegate:
             SliverGridDelegateWithFixedCrossAxisCount(crossAxisCount: 3),
         itemCount: 500,
         itemBuilder: (context, index) {
           return Container(
             margin: EdgeInsets.all(10),
             height: 120,
             width: 120,
             color: index.isEven ? Colors.indigo : Colors.amber,
             child: Image.asset(
               'assets/cat${index + 1}.jpeg',
               fit: BoxFit.cover,
             ),
           );
         },
       ),
     );
   }
 }
Using a Deferred Component:
To use the deferred component in your app, you can use a widget such as the FutureBuilder to load the component asynchronously and display a loading indicator while it is being loaded.
 import 'package:flutter/material.dart';
 import 'package:deferred_example/pages/samplepage.dart' deferred as box;

 class HomePage extends StatefulWidget {
   const HomePage({super.key});

   @override
   State<HomePage> createState() => _HomePageState();
 }

 class _HomePageState extends State<HomePage> {
   late Future<void> _libraryFuture;

   @override
   void initState() {
     _libraryFuture = box.loadLibrary();
     super.initState();
   }

   @override
   Widget build(BuildContext context) {
     return Scaffold(
       body: FutureBuilder<void>(
         future: _libraryFuture,
         builder: (context, snapshot) {
           if (snapshot.connectionState == ConnectionState.done) {
             if (snapshot.hasError) {
               return Text('Error: ${snapshot.error}');
             }
             return box.SamplePage();
           }
           return Column(
             crossAxisAlignment: CrossAxisAlignment.center,
             mainAxisAlignment: MainAxisAlignment.center,
             mainAxisSize: MainAxisSize.min,
             children: const [
               Text("Loading component..."),
               SizedBox(
                 height: 8,
               ),
               CircularProgressIndicator(),
             ],
           );
         },
       ),
     );
   }
 }
To build your app with deferred components, run the following command:
flutter build appbundleOn the first run, the Flutter validator may fail with issues that need to be addressed. The tool will provide recommendations for how to set up the project and fix these issues. It will also generate files that need to be manually moved or overridden in the android directory. Follow the tool's recommendations and move or override the generated files as needed to properly set up the project.
Generated Files :
<projectDirectory>/deferred_components_loading_units.yaml
You will need to copy the loading units from this file and paste them into the pubspec.yaml file, as well as mention the component in the settings.gradle file located in the android directory.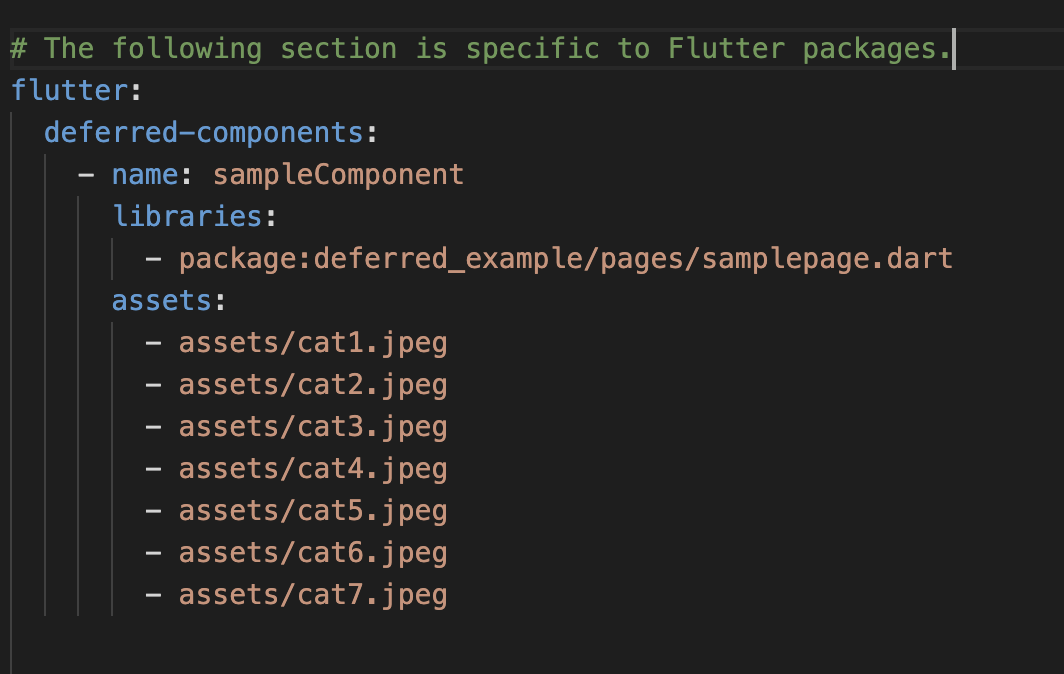

<projectDir>/build/android_deferred_components_setup_files
In the same way, update each file in the android folder.
strings.xml
loc: <projectDir>/android/app/src/main/res/values/strings.xmlandroid_deferred_components_setup_files
loc: <projectDir>/android/<componentName>AndroidManifest.xml
loc: <projectDir>/android/app/src/main/AndroidManifest.xml
Re-run command
flutter build appbundleAfter running the build appbundle command, check the terminal output to see if the message "Deferred components prebuild validation passed" is displayed. This message indicates that the prebuilt components included in the .aab file have been successfully validated and are ready for use. 😎
If you do not see this message, it may mean that there is a problem with the prebuilt components. In this case, you may need to rebuild the app or the prebuilt components to fix the issue. Once the problem has been resolved, re-run the build appbundle command to generate a new .aab file with properly validated prebuilt components.
Running the app locally
To run your app locally, you can use Android bundletool.
First, make sure you have built
an .aabfile for your app. Then, open a terminal and run the following commands:java -jar bundletool.jar build-apks --bundle=<your_app_project_dir>/build/app/outputs/bundle/release/app-release.aab --output=<your_temp_dir>/app.apks --local-testing java -jar bundletool.jar install-apks --apks=<your_temp_dir>/app.apksReplace
<your_app_project_dir>with the path to your app's project directory and<your_temp_dir>with any temporary directory, you want to use to store the outputs of bundletool. These commands will unpack your .aab file into an .apks file and install it on the device, along with any available dynamic features. The installation of deferred components will also be simulated. This is useful for testing your app locally before deploying it to the Play Store or other app markets.
Congratulations! If you have successfully created a proof-of-concept (POC) of a deferred component, you have taken an important step towards improving the performance and usability of your Android app. 😊
Resources :
Example project: https://github.com/abhishek-900/Deferred-Component-Example
Official Documentation: https://docs.flutter.dev/perf/deferred-components


